arbestlös

Nu har jag övergått från att vara mammaledig till att vara arbetslös, eller arbetssökande närmare bestämt. Jag söker jobb hela dagarna, de flesta som jag kan söka. Jag har en sådan längtan efter att ha ett jobb, att gå till en arbetsplats, att ha arbetskamrater, att uträtta något. Jo, visst kände jag mig viktig när jag var hemma med Jack också, då uträttar man ju stordåd varje dag. Men jag längtar att få känna mig lite proffesionell.

Så om det är någon som har något tips på jobb (förutom min ständiga syo wallen) så är de varmt välkommna!

fotoblogg 3191

Ett tips från Marie:
image270
Dagens bilder från fotobloggen 3191. Två tjejer som bor 3191 miles från varandra och fotar en bild varje kväll. Härlig inspiration från vardagen.

kort från förr

Ett kort jag gjorde förra våren.
image268
Tänkte visa och förklara hur man fodrar ett kuvert. Det blir så mycket lyxigare och mer speciellt. Först gör jag en mall till mönsterpappret av ett tomt kuvert i samma modell som jag tänker använda. Sedan klipper jag bort baksidan så att bara framsidan och triangeln är kvar, då klipper jag bort ca en halv centimeter runt om och på triangeln klipper jag bort så mycket som behövs för att limmet ska visas. Sedan är det bara att rita av mallen på ett fint papper, klippa ut, sticka in i kuvertet, stäng kuvertet och pressa på övre kanten, öppna igen och limma på kanten av triangel delen av det mönstrade pappret och pressa mot kuvertet, klart!
image269
Det här kortet har jag designat i Photoshop och sedan skrivit ut på en vanlig bläckskrivare.

snö på riktigt

image263
image264
image265image266
image267
och den bästa presenten.

boktips

image261
En gullig och fin bok om Aston som tycker synd om alla stenar som ligger ute alldeles ensamma och kalla. I pärmen av boken finns även en dvd med sagan animerad. Min son på ett år satt helt stilla och tittade nästan ända till slutet = bra betyg!
image262
Boken (utgiven 2005) är skriven och illustrerad av Lotta Geffenblad och filmen är gjord av Uzi och Lotta Geffenblad.

fyra generationer

image259
En LO med egenhändigt gjorda matryoshkas i illustrator. Vill du använda mallen så finns den här, eller skriv din mailadress i kommentarerna så kan jag maila en mer högupplöst.

image260

sjuk

igen.

gårdagens middag

Min födelsedag firades på De blauwe zalm i Gent.
image253
image254
image255
image256
image257
image258
Fisk och skaldjur. Champange och vitt vin. Fantastisk service och lugn atmosfär. Min man och jag. Perfekt!
Kategori: mat

mitt eget finaste kort

Jag gjorde ett popup kort till svågerns födelsedag. Här är framsidan:
image250
Och här är popupen:
image251
och en närbild:
image252

Hittade en sida med bra instruktioner och mallar att utgå ifrån. Kul pyssel!

finaste kortet

image249
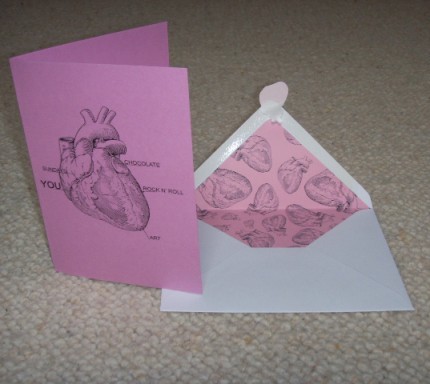
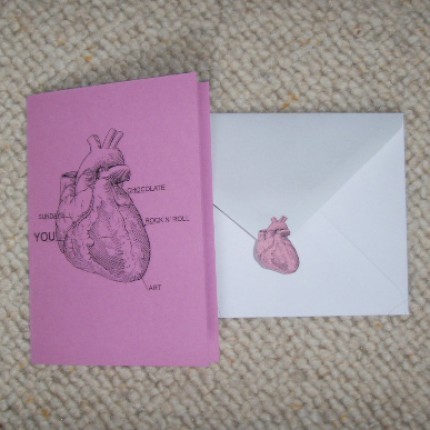
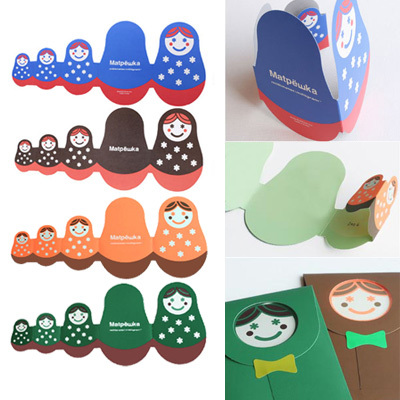
Jag kollar in matryoshkas för tillfället. Hummar på en idé till en scrapsida. Hittade dessa vackra kort. Ååå, de är så fina! Kolla kuvertet också, mmm. Tyvärr var shipping kostnaden 6dollars, vilket känns lite väl mycket för ett kort. Än så länge kan jag nöja mig med att bara titta på dem och digga idén. De går att köpa här.

make a belt

My man tells me it's really hard to find a decent, nice looking, not spectacular, leather belt, so he asked me to make him some.

Use leather or similar fake. Cut a strap that is the length you need (meassure around your waist) and the width of the inside of the buckle you are using, so it can run smoothly through it.
image233
make a mark about 5 cm from the end and in the middle of the strap.

image234
make a hole that's a little bit wider than the peg on the buckle. Then do another one about two cm further down from the first one. (the distance depends on the size of the peg)

image235
Cut a straight line from the outer edge of the first hole to the outer edge of the second hole, do the same on the other side, you'll end up with a rectangular hole with rounded corners.

Cut a small strap about 1,5cm.
image236
For the lentgh of the strap; meassure around two layers of your belt, cut with about 1cm seam allowance on the edges.

image237
To make the strap less bulky on the edge, make a diagonal cut from0,5cm towards the edge...image238
...as pictured above.

image239
Stitch the strap together with the ugly side up.

image240
Hammer it down, try to make it as flat as possible.

image241
Turn it nice side out, and bang it a bit more.

Slip the peg of your buckle into the rectangular hole and fold the edge down.
image242
Then stitch as close to the buckle as possible.

image243
(oops blury pic) Slip the little strap onto the belt and pull it down close to the seam you just sewn, in between the two layers.

image244
If you want to you can secure with a piece of double sided tape on the little strap. Then fold down the end of the belt and press it hard.

image245
Stitch from the top as close to the little strap as possible.

image246
Now you just have to make the holes, meassure around your waist where you want them. I had 3cm in between the holes, but that's up to you.

image247
Ready to wear!

image248
I made a few, while I was at it. Store them rolled up like this, since they're going around your body later on...
Kategori:

snö

I Gent snöade det en dag.
image232
Det låg på marken en liten stund, sedan haglade det, sedan regnade det, nu är det sol och ganska varmt.

Är det snö i Stockholm? Jag saknar snön.

a bag

image230image231
It's finished! An easy construction turned out pretty hard to make, without the right machines, I so need a skiver! Well, I pulled it off anyway, not to the great standard I was hoping, but if you don't check the inside of the top seam it's all right. I'll still use it, I'm not that picky. It's a great size bag, I really need one.
Kategori:

bästa torkstället för färsk pasta

image229
Kategori: mat

and a pocket

I'll show you how to make the easiest pocket there is. I usually put them in the lining of the bag, where there is no need for the wow factor. But pockets in linings are very useful, so don't be to lazy to not do them, just do an easy one.
image224
Start with cutting out a square shape the size you want +1 cm of seam allowance around and 2cm fold allowance on top. Fold the top bit twice and stitch it down. (the square stitching on the pic is just from my label) Then iron in the seam allowance as pictured.

image225
Pin it into place.

image226
Start your stitching about 5cm from the top and stitch upwards ca 2 cm, then go diagonal up towards the top, turn....
image227
...do a few stitches until you reach the corner, turn and go down over your starting point.

image228
Stitch around the pocket and finish off in the same manner as on the other side. Finished!

The triangular shapes are only there to make it more durable, if you think there is no need for that, just skip it and do a straight seam.
Kategori:

more details of a bag

The closing of the bag will be like this:
image221
And you make it like this:
image222
You don't need to use a round core, I did it without one, that way it's a bit softer and more bendable.
image223
To make the toggle durable use glue or double sided tape.